Being Part 2 of the Split Junk Trilogy. Part 1 discussed the Split Junk Rig and why I’m excited about it. This part will discuss my test build. Part 3 will discuss some particulars about sail panel design and construction.
Split Junk Model
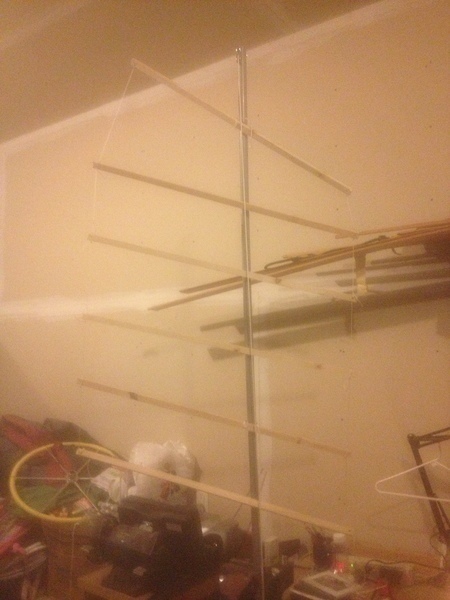
The first thing I did was to follow Slieve’s advice and make an extremely crude model out of general shop scrap. It cost nothing but several hours of futzing around. After deciding the dimensions looked right and doing some basic rigging testing like working the halyard and testing lazy jacks it was time to proceed to fabrication.
The natural testbed for a radical sail experiment is a cartopper, in my case Afternoon Delight (aka Addie). Here’s a refresher picture of her original rig.
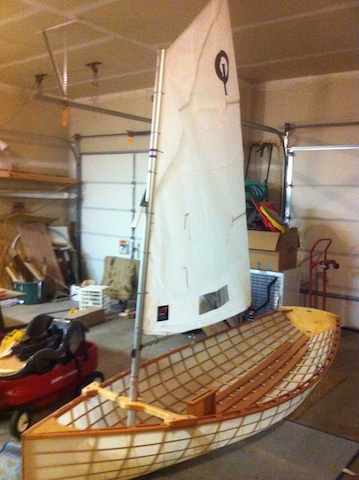
Addie: Before
Last time Addie graced these pages we had a fine adventure testing her rudder modifications which ended in breaking the mast step. I had already fabricated a replacement (intended for her original sprit rig) and tested it once. My expectation was that it would be in the wrong location for a Split Junk, but having already built about 7 mast steps I decided to use it anyway and expect to have to redo it.
I expected the sail would need several iterations as well. Working in IT, the concept of Agile Programming naturally comes to mind - let’s call this Agile Boatbuilding.
Agile Boatbuilding
Agile Programming has a set of dictums:
- Make it Work
- Make it Right
- Make it Fast
Not too bad, but we can do better for Agile Boatbuilding
- Make it Cheap
- Make it Fast
- Make it Work
- Make it Right
Bill of Materials
- Tarp ($7)
- 1/2" Aluminum Conduit ($10)
- 14' Douglas Fir spar ($0 - scrap from building Addie)
- Picnic Table awning base ($0 - borrowed from Mom)
- Sewing Machine ($0 - borrowed)
- Line (~$30 - new New England ropes from Dynamic Sailor)
- Webbing ($10)
- Makers Mark ($30)
So, let’s make it cheap. Mission accomplished. You can see the money went to the most important bits (cordage and libation). I could have gone cheap with some Fleet Farm rope, but when you’ve got friends who sell good rope you don’t buy cheap rope elsewhere.
Rigging
-
Halyard
The halyard is simply 1/4" line through a single block on the masthead routed to a cleat on the mast base.
-
Lazyjacks
Each lazyjack consists of a fixed loop of 1/8" tied to a carabiner. The carabiners need to be clipped to the top of mast ring before stepping the mast. A little awkward, but because it can be done at the dock and the mast can stay up with the sail reefed it’s not a big deal. You would do something much more sophisticated on a bigger boat that stays in the water.
-
Downhaul
The downhaul on the split junk actually serves two functions - downhaul and batten parrel (holding the sail to the mast). I used Slieve’s “updated” version belayed to a cleat on the side of the mast step.
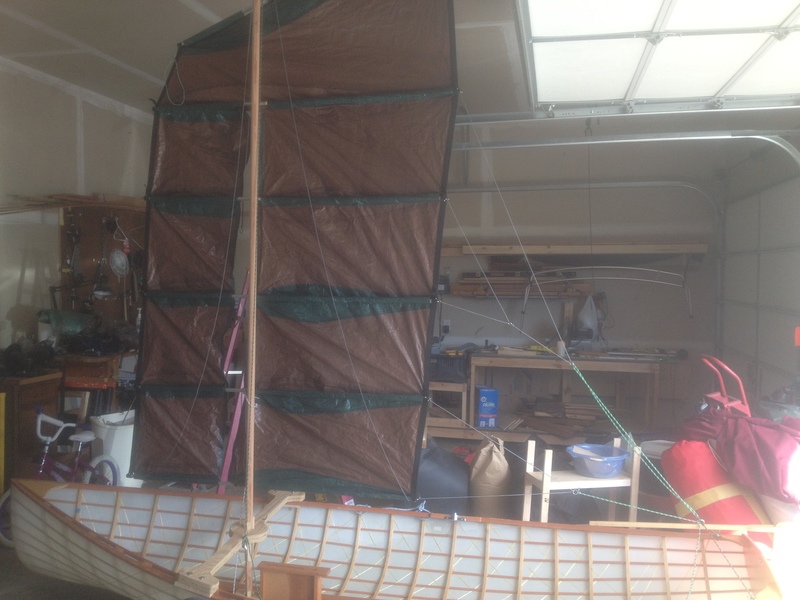
First step was to 8-side the mast and put a ring bolt in the top to serve as attachment point for halyard block, lazyjacks, etc. I’ll reserve the details of the sailmaking for Part 3.
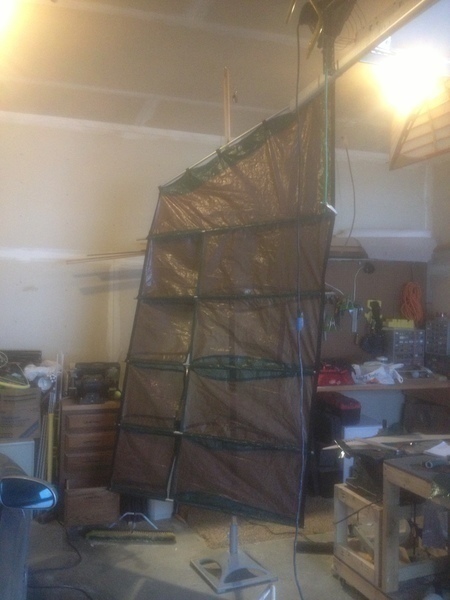
Sail Hung
As you can see, the sail wants to cant forward at the base due to the peak of the sail. There are several ways junk rigs compensate for this (yard hauling parrel, throat hauling parrel, etc.). I opted to skip these complications and just rely on the downhaul. More on that later.
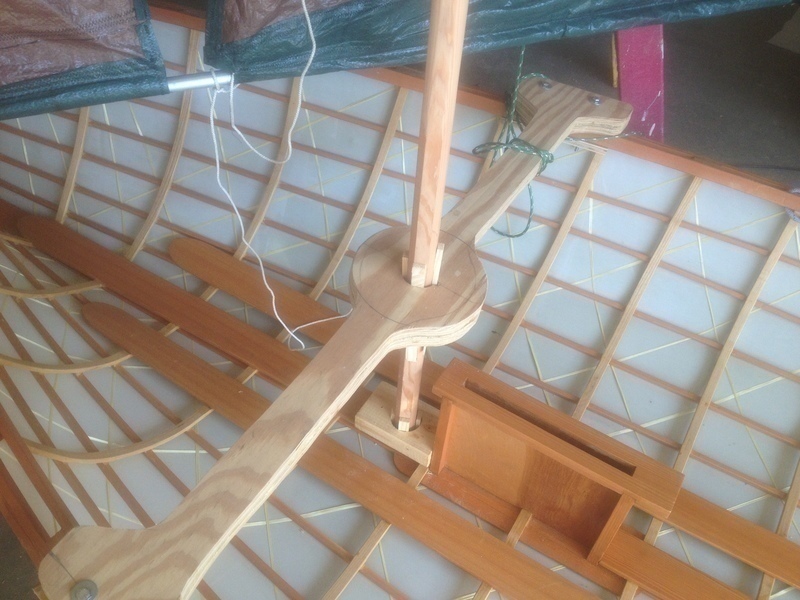
Redneck Mast Step
Knowing that the mast step was probably in the wrong place, I just chopped a 2x4, holesawed it and epoxy tacked it down. Varnish? I don’t think so. Agile. The sprit mast didn’t go all the way to the keel, so I didn’t have that option previously.
Fully Rigged
With the mast step in place, the only thing left was to hoist the sail and rig the sheetlets. This took a bit of fiddling, but turned out pretty well. It’s hard to see in the photo, but I used a rope tied to both gunwales with enough slack to clear the tiller as a traveler.
Sea Trial
The sea trial wasn’t exactly under ideal conditions (blowing 20 with whitecaps), but given our motto here and the fact it was my birthday - what do you do? You “embrace the suboptimal” and go sailing.
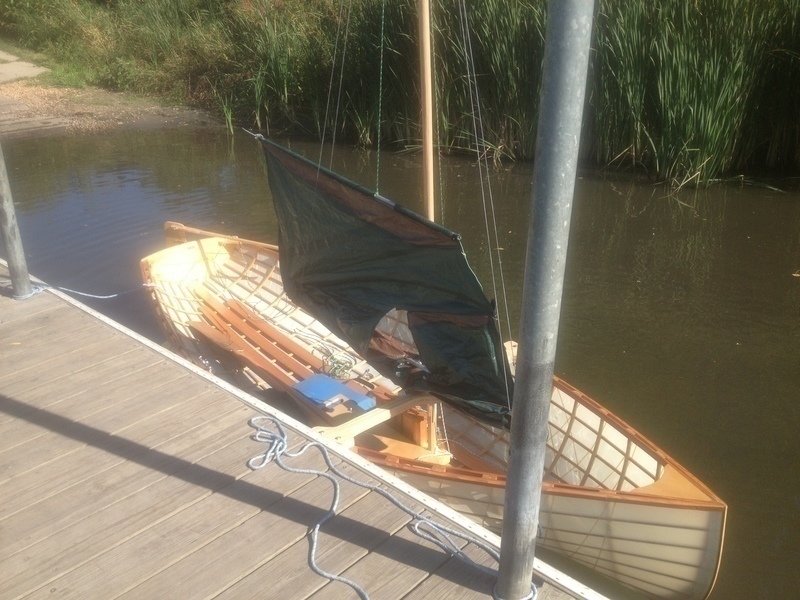
Addie SJ ready for trial
The wind was blowing off the dock, and it was quite blustery. I rowed off the dock, hoisted the sail (downwind hoist) and took off down the lake. I was quite pleased until I got to the end of the lake and turned around to head back. I was making good speed upwind and seemingly wasn’t having too much leeway (although that’s hard to judge on a choppy lake). Remember when I expected the mast step would need to move? I was right. I couldn’t make a tack to save my life. So I ended up rowing back, into a 20 knot wind. Rowing back across Cedar Lake seems to be a theme in the adventures of Addie. But sailing your science project on your birthday? Priceless.
What Went Well
-
Performance
I was completely and utterly unprepared for the acceleration when I hoisted the sail for the first time. This rig is a downwind rocket. It did quite well upwind as well.
-
Easy reefing
This is one of the standard selling points of junk rig, so no surprise. That being said, the way to reef the old rig was to brail the boom up, remove the mast, and stuff the whole lot into the boat. Somewhat of an interesting procedure in a chop. It’s much nicer to drop the halyard, let the sail drop into the lazyjacks, tighten the downhaul and belay.
-
Adjustability
I tried several different configurations (half reefed, one panel, top panel only, etc.) by moving my one downhaul. It is very easy to adjust sail area to conditions. It would have been even easier with multiple downhauls rigged.
Room for Improvement
-
Lack of Tack
This is a fault of the boat (and owner) not the rig. Moving the mast step back would be a partial fix. The other part of the problem is the general amount of windage forward. With the sheer forward and my weight in the back Addie is basically a wind vane. The sail itself did very well upwind. I really want another crack on a balanced hull/rig platform.
-
Headroom
Almost every time I attempted tacks or jibes the sheetlets fouled on my lifejacket. I couldn’t duck low enough. A couple of extra feet on the mast or a longer boat where I could position myself better would fix this. Again not a strike on the rig itself.
-
Single downhaul/parrel
The split junk combines mast parrels and downhauls in a quite clever way. Because I was in a hurry, I only fitted one spanned downhaul out of two. I figured reefing half the sail would be adequate. From a sail area perspective that was correct, but on the tack where the sail was to leeward of the mast the top two panels sagged off. Didn’t seem to affect drive in any way, but it looked sloppy.
-
Need to secure yard
Similar to the downhaul issue, some way of keeping the yard secured to the mast is necessary. I’ve looked at yard and throat hauling parrels, but haven’t liked the extra strings and complications. The best idea I’ve seen yet is Dave Zeiger’s “strut” concept from the Rig o' Morale. More to come on that one.
Summary
The Split Junk is an extremely promising rig. It is fun to sail (and also to make). I’d say we got 3 out of 4 on the Agile Boatbuilding scorecard: Make it Cheap? (check), Make it Fast? (check), Make it Work? (check). Remaining item: Make it Right. There are a few shortcomings to my implementation, most of which can be fixed by simply adding or moving rope. The other downsides stem from using a boat which was meant to be a rowboat as a sailboat. This could be rectified by making yet another mast step farther aft. Maybe I’ll go that route, but I’ve got another idea.
What happens next? Stay tuned. I guarantee there’s more junk in my future.
Another Idea